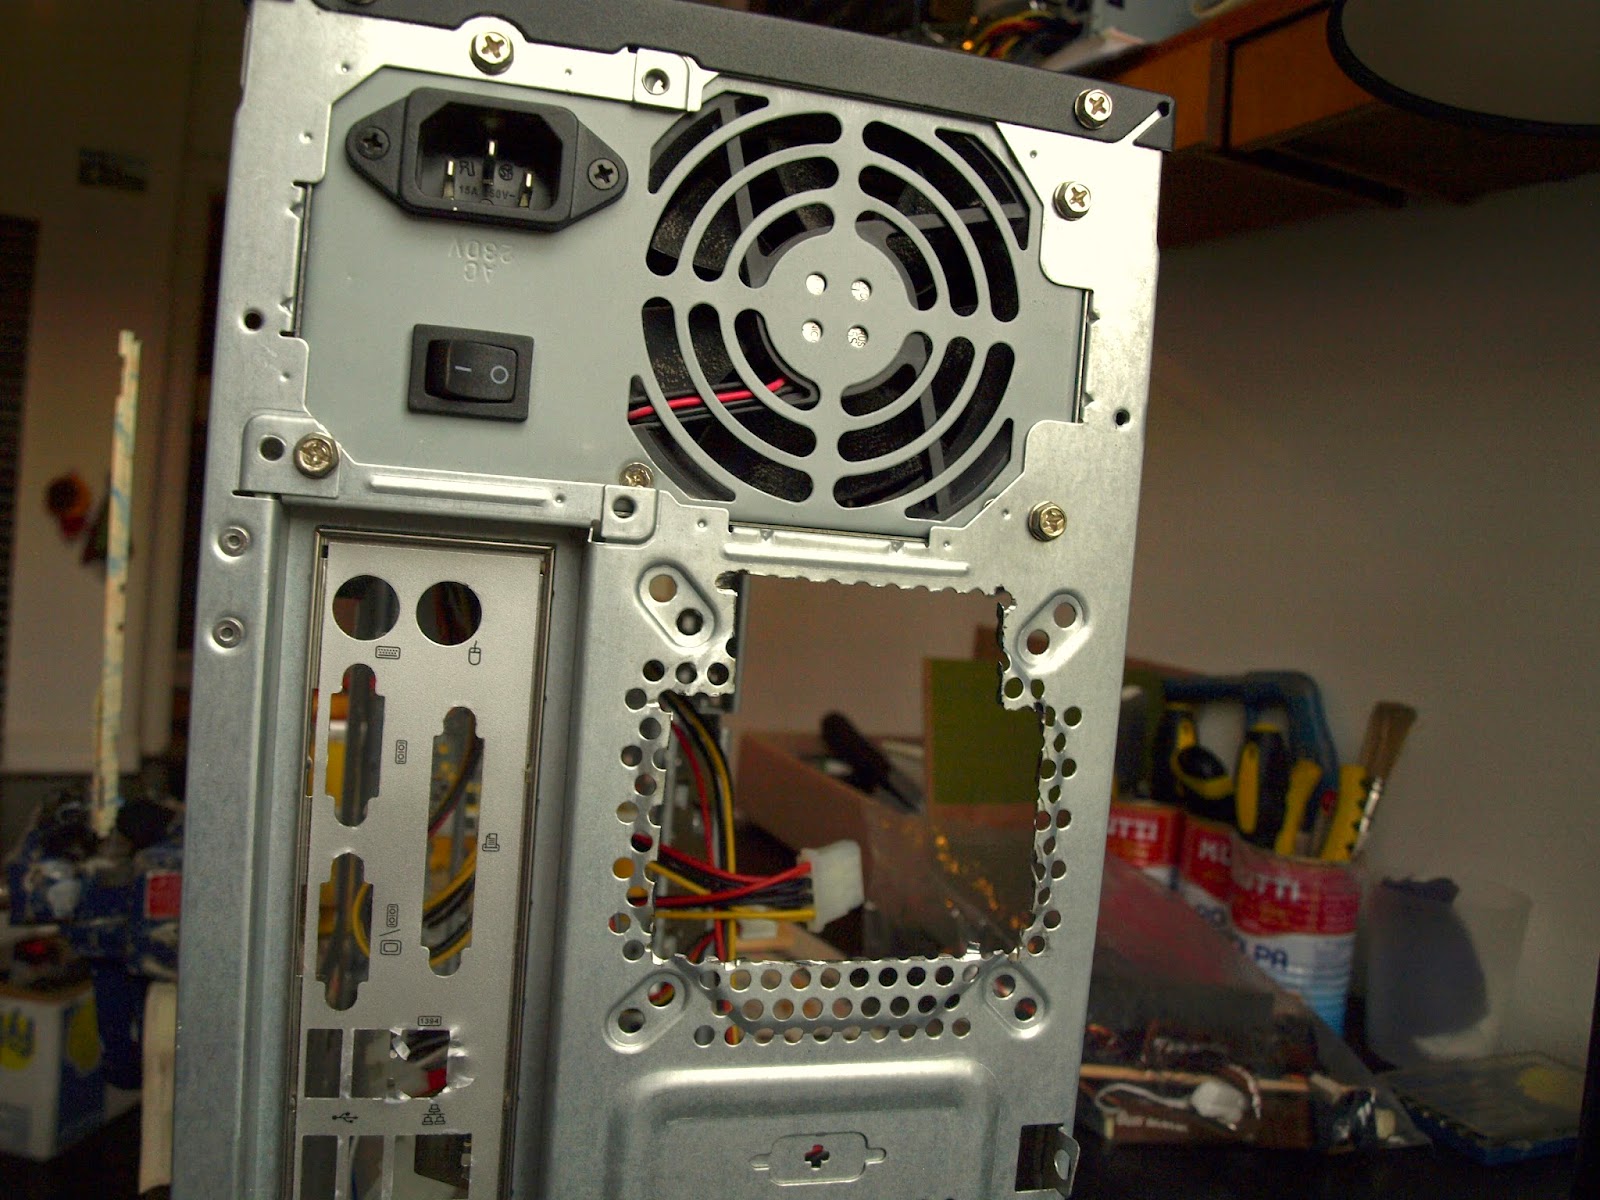
The interface for connecting external power was mounted. To make the hole a number of small hole were drilled, followed by a whiles filing and carving to get a perfect size.
Friday, October 31, 2014
Air holes
Some scary sawing was done, during which the awesome oscillatory saw broke down to much dismay. Must have been a poor sample. Grill were glued on, and now there is only one last air outlet to make.
Case fan mounting
The case fan will be mounted under the handle on the top of the Detectron case. With the plan to add hinges to the Detectron lid, space was vary scarce, and the case fan needed to be situated all the way to the backside of the case. To support both hinges and case fan, a very satisfactory wooden backpiece was constructed.
However, this turned out not to work at all for mounting the hinges, as the revolving axis needed to be further in than what this construction allowed. Hinges are terrible things, that will be painstakingly described later. There was nothing else to do than to scrap this nice one, and make a new version of the backpiece. The fan will be mounted directly on the grill using four longer bolts, and eventually using nuts instead of a rubber band.
Scavenging
To get grills for the necessary air holes in the Detectron computer, the angle grinder was once again brought to play. The largest grills were cut off from the spare parts computer case that is lying around for Detectron transplantation. Further, the last potentiometer and speaker were removed from the Detectron lid.
Monday, October 20, 2014
It's alive!
Way too much time has passed since Detectron component arrival without testing that the ordered components actually work and add up to a computer. In this post, everything is hooked up for a quick test-boot or two. In this Frankensteinian construction, a rubber band was used to attach the chassifan to a piece of wood, that also got the honor of balancing the harddrive.
Since the case is yet to be done, one very important thing is missing: the power button. A power button for a modern computer is however nothing more than a fancy way of closing a circuit for half a second, or however long you take to push it. Thus, a power button can easily be faked by for example a screwdriver briefly touching the correct two pins on the motherboard. Yeah!
Beeeep.
Happy Detectron owner! While showing the boot setup, the Detectron fans did not make a sound, and CPU temperature was at a steady 33
°C.
power supply unit mounting
The following post contains one of the weirder solutions so far in the Detectron computer case construction. Even though the power supply unit (PSU) is one of the smallest on the market, fitting it into the Detectron case which is only 62 mm high has caused unhealthy amounts of pondering. A normal person would perhaps argue that fitting something which is 40 mm into a 62 mm slot should be within the range of the plausible, but the problem arrises when also considering the I/O button electronics that also need to sit in this space. On top of the PSU. Let's see how this has been solved.
Apart from requiring a slim mounting solution when mounted, there is also the issue of actually performing the mounting. In a regular computer case a PSU would be slided in into a perfectly sized compartment along the longest axis, and then screwed into place. However, with the PSU orientation needed in this case, the screw-holes of the PSU will be completely blocked - and it needs to go in from the top. To solve this, something very unorthodox has been done. First a holding point was created on the bottom of the case using two pieces of wood that were painstakingly carved to cradle the PSU. These were glued onto the case, but not until a strap was sewn (yes, sewn!) and attached to them, to a tightly as possible hold the PSU down and fast against the case floor.
This gave an extremely slimmed solution, which nevertheless fixates the PSU in all degress of freedom. Please inspect below! A scrap-salvaged old-school PSU power cable can also be seen.
Apart from requiring a slim mounting solution when mounted, there is also the issue of actually performing the mounting. In a regular computer case a PSU would be slided in into a perfectly sized compartment along the longest axis, and then screwed into place. However, with the PSU orientation needed in this case, the screw-holes of the PSU will be completely blocked - and it needs to go in from the top. To solve this, something very unorthodox has been done. First a holding point was created on the bottom of the case using two pieces of wood that were painstakingly carved to cradle the PSU. These were glued onto the case, but not until a strap was sewn (yes, sewn!) and attached to them, to a tightly as possible hold the PSU down and fast against the case floor.
This gave an extremely slimmed solution, which nevertheless fixates the PSU in all degress of freedom. Please inspect below! A scrap-salvaged old-school PSU power cable can also be seen.
Saturday, October 18, 2014
Airflow and inner layout
It has been somewhat hard to exactly imagine how everything would fit into place inside the small detectron case, but now with the components in hand and the first attachments made, things are starting to fall into place. One major issue has been how to allow airflow for cooling the CPU. Some inlets and outlets are needed, and they need to be placed to allow a reasonable path for the air to take, without any unnecessarily ugly holes in the case. See below the current sketch of how a detectron computer innards can be placed.

New in this design is putting the lid on hinges to allow easier opening of the case. This also has the dual benefit of allowing mounting of the CPU air vent and SSD on the lid, which reduces the need for other supporting constructs. Assembly of the hinges, lid and case will likely prove tricky, but it should work. Last, this sketch also shows how the inner power cord will be attached to the power supply unit, and then led to a secondary power connector beside the rest of the case inputs.
Subscribe to:
Posts (Atom)